Bisecting an angle using only a straightedge and a compass
Bisecting an angle, also called constructing the angle bisector, using only a straightedge and a compass is what I will show you here.You may realize that it is a lot easier than copying angles. I will show you the steps to bisect an acute angle. The steps are still the same when the angle is right or obtuse.
Therefore, study the steps outlined here carefully and you will be able to bisect any angle.
Bisect Angle A:
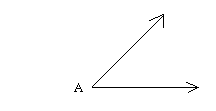
Step 1:
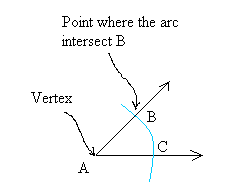
Place the needle of the compass at vertex A and draw an arc of any size.
Call the points where the arc intersects the rays, B and C.
Step 2:
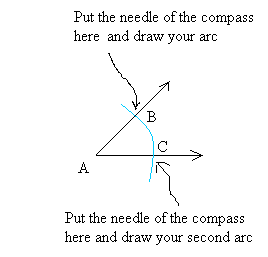
Open the opening of your compass to a distance greater than the distance you used to draw the arc above.
Then, keeping the opening of the compass the same, put the needle of the compass at B and draw and arc.
And put the needle of the compass at C and draw and arc.
Step 3:
You should get something like that.The two arcs intersect where you see the red spot.
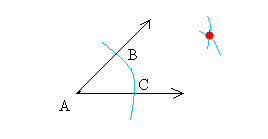
Step 4:
Draw a line between the vertex of A and the red spot and you are done!
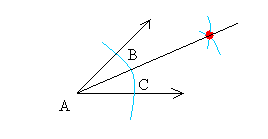
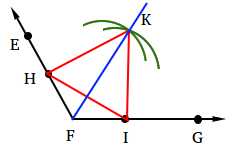
Bisecting an angle by creating an equilateral triangle inside the angle.
This way of bisecting an angle is less common, but it is worth knowing how to do it. This time, we will bisect an obtuse angle.
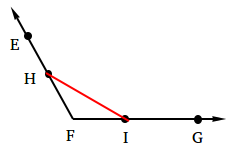
Start with an angle named with 3 points such as angle EFG.
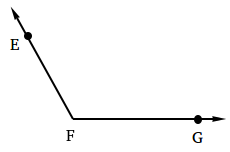
Step 1:
Choose a point on EF and call it H. Then, choose a point on FG, call it I, and make sure that FH = FI.
To ensure that FH = FI, you need to use your compass, measure the length of FH, and use the same length for FI.
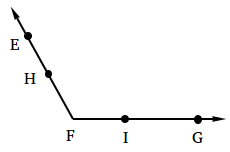
Step 2:
Draw segment HI.
Step 3:
Using HI as one of the three sides of an equilateral triangle, construct an equilateral triangle.
Step 4:
Using your compass, measure the length of HI.
Step 5:
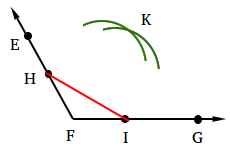
Keeping your compass opening the same, put the needle of the compass at H and draw an arc. Then, still using the same opening, put the needle of the compass at I and draw an arc.
Call the point of intersection of the arcs k and you should end up with the following figure.
Step 5:
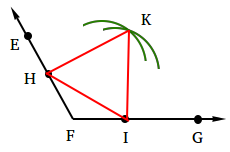
Using your straightedge, draw triangle HKI.
Step 6:
Finally draw segment FK. FK is the angle bisector of angle EFG.
