How to construct a square
Here is how to construct a square using a straightedge, a compass, and of course a pen or a pencil.
Step 1
Draw a segment and call it AB.

Step 2
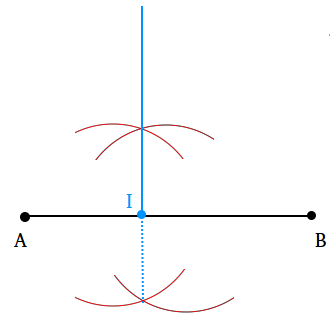
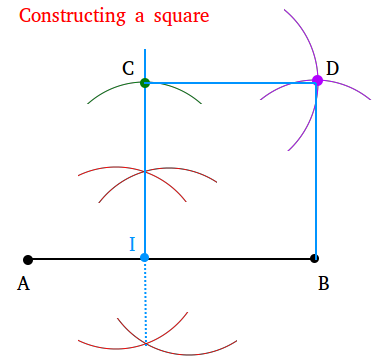
Construct a line perpendicular to segment AB and let I be the point where the perpendicular line intersects segment AB. Review the lesson about constructing perpendiculars if needed.
Step 3
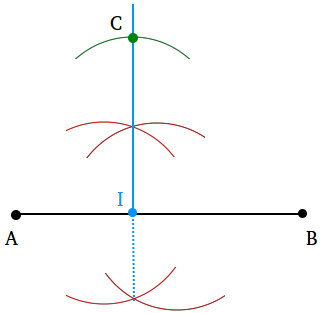
Set your compass to the length of IB. Then, copy segment IB onto the perpendicular line (shown with the blue line). Label the new point on the perpendicular line C.
Step 4
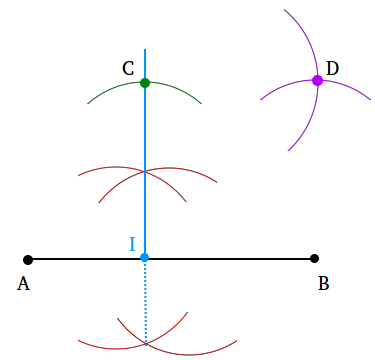
Set your compass again to the length of IB and draw arcs from point C and from point B. Label the point of intersection between the two new arcs D.
Step 5
Using a straightedge, draw segment CD and segment BD. You have just constructed the square ICDB shown with 3 blue segments and 1 black segment.
How to construct a square : Method #2
Step #1: Using a straightedge, draw a segment AB with a length of your choice.
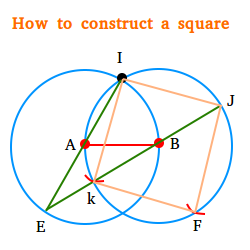
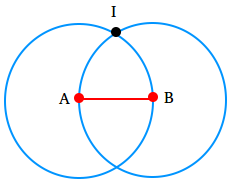
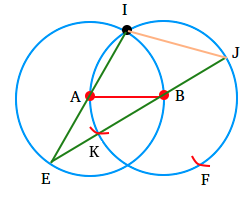
Step #2: Using a compass, measure the length of segment AB. Keeping the opening of your compass the same, put the needle of the compass at point A and draw a circle. The length of the radius of the circle will be equal to the length of segment AB.
Then, still keeping the opening of your compass the same, put the needle of the compass at point B and draw another circle. After you are done drawing both circles, you should end up with the figure below. Finally, label the point where the two circles meet I.
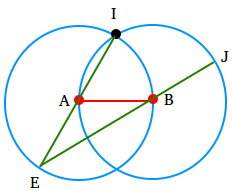
Step #3: Then, draw segment IE and then draw segment EJ as shown below.
Step #4: Draw segment IJ and then using your compass, measure the length of segment IJ.
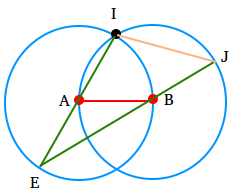
Step #5: Still using the same compass opening in step #4, put the needle of the compass at I and draw a small arc. Label the arc K. Then, still using the same compass opening in step #4, put the needle of the compass at point J and draw a small arc. Label the arc F.
Step #6: Finally, connect the points I, J, F, and K. You have just constructed a square using only a straightedge and a compass.
The figure below shows the square in light orange.
