Isometric drawing
An isometric drawing uses isometric dot paper in order to draw objects. It may not be easy to draw objects that have length, width, and height such as a box on a piece of paper.
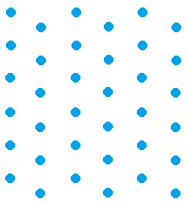
 Isometric dot paper
In order to draw or make objects that are three-dimensional on a piece of paper, you will need the above isometric dot paper. Pay careful attention, if you will, to how the dots are laid out.
Let us try to make an isometric drawing of a fridge for example. We will show 3 sides of the fridge from the corner view. Corner view just means that the corner of the fridge will face you as opposed to the front of the fridge facing you.
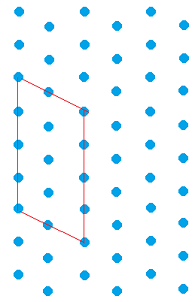
First, draw the front of the fridge. We show this in red in the figure below.
Notice that when we draw the front of the fridge, it is important to make it look like a parallelogram, not a rectangle.
 Isometric drawing of the front of a fridge
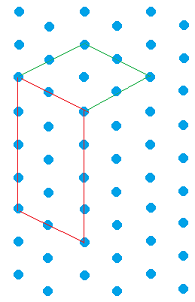
Second, draw the top of the fridge. Some of the top is shown in green. Notice again that when we draw the top of the fridge, it is important to make it look like a parallelogram, not a rectangle.
 Isometric drawing of the front and top of a fridge
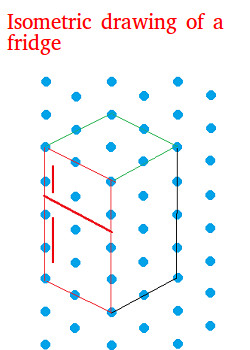
Third, draw the side of the fridge. Some of the side is shown in black. Finish the fridge by drawing the doors and perhaps a few other features.
Here is the isometric drawing of a fridge

What is the meaning of the expression
"isometric drawing" in Greek ?
In Greek, metron means "measure" and isos means "equal". Therefore, in an isometric drawing, all 3-D measurements are scaled equally.
Use isometric drawing to draw these geometric figures
To print an isometric dot paper worksheet in a PDF format for your classroom, you can click here.
Try this:
Print the isometric dot paper worksheet using the link above and then try to make an isometric drawing of the following three-dimensional figures.
A cube:
Once you are done making an isometric drawing of the cube, you will notice that the three faces that you can see are equilateral parallelograms.
A rectangle:
Once you are done making an isometric drawing of the rectangle, you will notice that the faces are not equilateral parallelograms.
A staircase:
You could make a staircase that looks like it is made of 6 cubes when it is done.